
Most homeowners who think their damaged garage floor epoxy coating job is impossible are wrong. Cracks, pitting, oil staining, and even completely failed previous coatings can usually be repaired and re-coated with a system that lasts as long as a new install. The handful of slabs that genuinely cannot be saved have specific signs you can spot in five minutes. This guide tells you which is which. Walk into your garage with a flashlight, this article on your phone, and you will know whether to call a coating contractor or a concrete replacement crew.
Written for Toronto and GTA homeowners staring at a floor they assumed was beyond help. The honest answer is usually: it can be fixed.
What We Will Cover
- Walk-the-Floor Assessment in Five Minutes
- Damage That Is Salvageable (Almost Everything)
- Damage That Is Not Salvageable (Rare)
- Cracks: Hairline, Structural, Settlement
- Oil and Chemical Staining
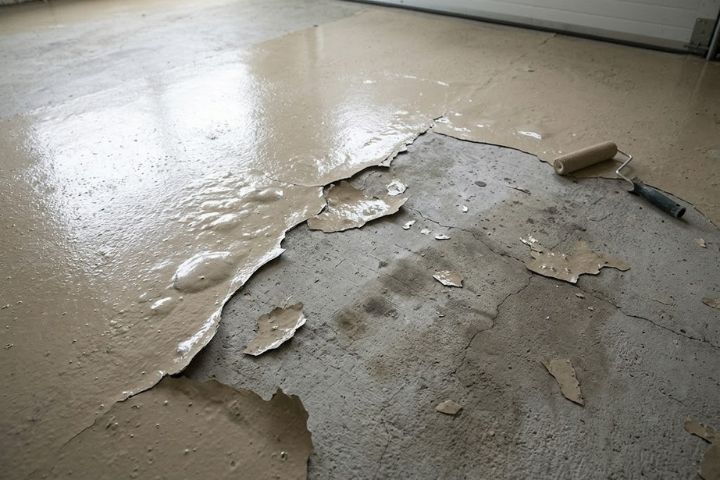
- When a Previous Coating Has Failed
- The Repair Process Step by Step
- Common Questions About Damaged Garage Floors
Walk-the-Floor Assessment in Five Minutes
Before you decide your damaged garage floor epoxy plan, do this quick walk-through. You need a flashlight, a pen, and a credit card.
- Stand at the door and look at the slab in raking light: The shadows show high spots, low spots, and crack patterns better than overhead light does.
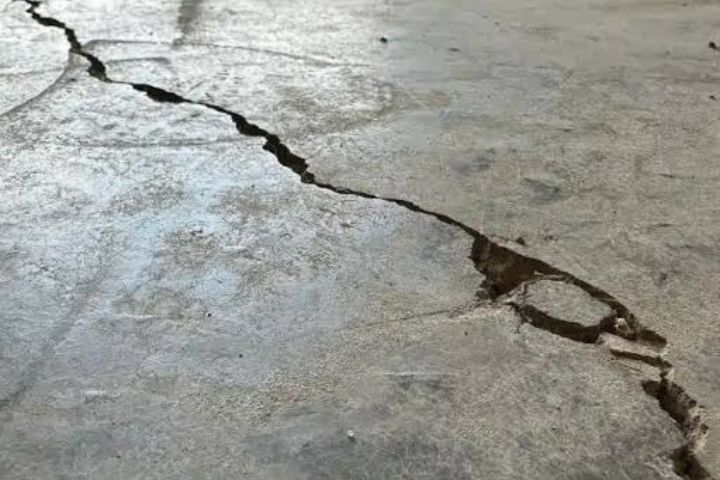
- Walk every linear foot of every crack: If you can fit the credit card edge in (less than 2 mm), it is a hairline. If you can fit it flat (2 to 6 mm), it is moderate. If you can fit your finger in, it is significant.
- Press a coin or pen into any pitting or spalling: If material crumbles, the surface is degraded but the slab below is probably sound. If a hollow sound returns when you tap, the layer has separated from the underlying slab.
- Look for staining: Brown ring stains are oxidation (often from steel wheels). Dark spots are oil saturation. White crystalline patches are efflorescence (mineral salts pushed to the surface by moisture).
- Check the perimeter: Where the slab meets the wall, look for separation, settlement, or daylight. This tells you if the slab has shifted away from the foundation.
Write down what you see in three categories: cracks (count and width), surface damage (pitting, spalling, hollow sounds), staining (where and what type). That note is exactly what an installer needs to give you a real quote.
People Often Ask
Can you epoxy over a really old garage floor? Yes, in almost every case. Old slabs are usually denser and better cured than new ones, which actually makes them better candidates for coating. The age of the concrete is rarely the deal-breaker; the condition of the surface and the moisture state of the slab are what matter.
Damage That Is Salvageable (Almost Everything)
Here is the long list of garage floor damage that looks scary but is routinely repaired and re-coated. If your floor has any of these, the project is feasible.
- Hairline cracks (under 2 mm): Standard. Almost every cured slab has them. Filled with semi-rigid epoxy joint filler before coating.
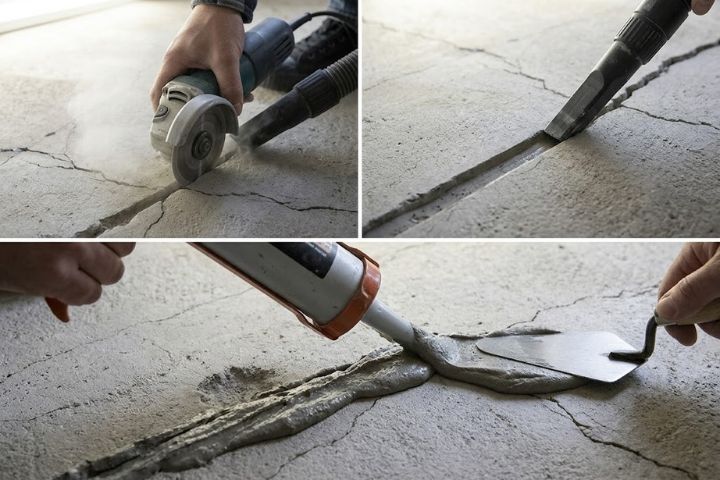
- Moderate cracks (2 to 6 mm): Routed open with a saw, vacuumed clean, filled with high-strength epoxy mortar.
- Surface pitting and spalling up to 1 cm deep: Filled with polymer-modified concrete patching compound, troweled flush, profiled with the surrounding ground area.
- Heavy oil staining: Hot pressure-washed with industrial degreaser, then diamond-ground to expose clean concrete underneath. Stains rarely penetrate more than 2 to 3 mm into a cured slab.
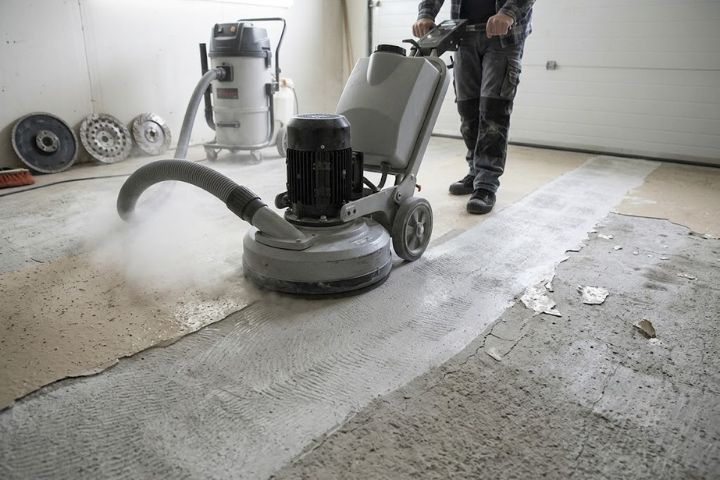
- A previous failed epoxy coating: Removed by shot blasting or aggressive grinding, slab profiled to CSP 3 to 4 for the new system.
- Tire-pickup damage from hot tire failure: The peeled coating is removed, the slab is re-profiled, and a polyaspartic-topped system goes down to prevent recurrence.
- Efflorescence and mineral deposits: Cleaned with a mild acid wash followed by neutralization, then ground if needed.
- Old paint over the concrete: Mechanically removed by shot blasting. Garage paint is the easiest old coating to remove because it sits on top rather than penetrating.
If you have any of the above, your damaged garage floor epoxy install is a normal repair-and-coat project. Cost runs $1.50 to $4 per square foot above a clean-slab installation, depending on how much repair is needed.
Damage That Is Not Salvageable (Rare)
A small number of slabs are genuinely beyond coating. Here is what disqualifies a floor.
- Active settlement: If a section of the slab has dropped 1 cm or more relative to the surrounding floor and is still moving, the slab needs underpinning or replacement before any coating goes down. A coating cannot bridge an active settlement crack; it will tear apart in a season.
- Through-slab cracks with vertical displacement: If one side of a crack is higher than the other by more than 3 mm, the slab has fractured into two pieces that are moving independently. Repair grade-beam style or replace.
- Severe alkali-silica reaction (ASR): A spider-web pattern of cracks across the entire slab with white gel oozing from the cracks indicates ASR. The concrete is chemically degrading and a coating will not stop the process.
- Hollow slabs over more than 25% of the surface: When you tap and most of the slab returns a hollow sound, the upper layer has separated from the substrate. Repair via mudjacking or polyurethane injection before coating, or replace if the void is too large.
- Persistent moisture above 6 lbs per 1,000 sq ft per 24 hours: Some slabs over wet clay or with damaged vapor barriers wick water continuously. Even moisture-mitigation primers cannot keep up. Address the drainage problem first; coating will not solve it.
If you suspect any of these, get a structural assessment before pricing a coating. The cost of misdiagnosis (paying for a coating that fails inside a year) is much higher than a one-hour engineer’s visit.
Pro Tip
If you see white gel weeping from cracks, do not coat. That is alkali-silica reaction (ASR), the slab is chemically deteriorating, and any coating you put down will be torn apart from below within months. ASR cases need full slab replacement.
Cracks: Hairline, Structural, Settlement
Hairline Cracks
The most common form of damage in any cured concrete slab. Caused by normal shrinkage as the concrete dried. Width under 2 mm, no displacement, no growth over time. Repair: vacuum clean, brush in a low-viscosity epoxy crack filler, scrape flush. Cost: roughly $30 to $60 per garage in materials. Visible after coating? Sometimes as a faint line; flake-broadcast finishes hide them completely.
Structural Cracks
Wider (2 to 6 mm), often run from corner to corner or from the door to a wall. Width can fluctuate slightly with temperature. Repair: route open with a saw to a uniform 6 mm width, vacuum, fill with semi-rigid polyurea or epoxy joint sealant that flexes slightly. The repair will be visible as a thin line under solid color coatings; flake broadcast hides it.
Settlement Cracks
The serious ones. Indicate one part of the slab has moved relative to another. Look for vertical displacement (one side higher), continuous growth over months, and dampness along the crack. Settlement cracks need to be evaluated by an engineer. If the movement has stopped, polyurethane foam injection beneath the slab (mudjacking) can lift and stabilize. If movement is ongoing, the underlying soil or base needs work before any coating discussion.
Oil and Chemical Staining
Oil-stained concrete looks worse than it is. Most oil saturation reaches no more than 2 to 3 mm into a properly cured slab. Diamond grinding removes the contaminated layer along with the surface concrete that was going to be ground anyway as part of standard prep. The clean concrete underneath bonds to the new coating normally.
The exception is decades of accumulated petroleum exposure in heavy-use bays. If the floor smells like a service station even after pressure-washing, the saturation is deep. In that case, two grinding passes are needed plus a primer designed for contaminated substrates (something like a moisture-and-oil tolerant epoxy primer). Add roughly $1.50 per square foot to the prep cost.
Brake fluid is harder than oil. Brake fluid is hygroscopic and chemically aggressive; it can penetrate deeper than oil and cause the slab to spall. If you see localized spalling under where a brake fluid spill happened, treat that spot as standard repair (route, fill, profile) before coating.
Save Your Money
Do not pay for a chemical “concrete deep cleaner” treatment from a contractor. The diamond grinding pass that is part of any proper prep removes 1 to 2 mm of the surface, which is more material removal than any chemical treatment achieves. Ask about the grinding step instead; that is the actual cleaning.
When a Previous Coating Has Failed
Failed coatings are the most common reason homeowners think their garage is unsalvageable. The reality is that removing a failed coating is straightforward; it just adds a step to the prep.
- Peeling DIY epoxy: Shot blasting removes it in one or two passes. Cost: roughly $1.50 per square foot above standard prep.
- Hot tire pickup damage: The lifted areas are removed by mechanical action; remaining intact coating is shot blasted off so the new system bonds to bare slab. Re-coat with a polyaspartic topcoat to prevent recurrence.
- Roll-on garage paint: Easiest of all to remove. Shot blasting takes it off in a single pass.
- Old industrial epoxy mortar: Aggressive grinding (30-grit metal-bond) cuts through. Adds time but no specialized equipment.
For more on coating failures and how to prevent the next one, see how to stop your epoxy garage floor from peeling and our notes on why epoxy floors peel in Toronto winters. Avoiding the second failure is mostly a matter of prep quality and choosing the right coating system. For a fuller comparison of options, see our epoxy vs concrete polishing guide.
The Repair Process Step by Step
Here is what to expect when you hire a contractor to coat a damaged garage floor. A typical project on a 450 square foot double-car garage with moderate damage runs 5 to 6 working days.
- Day 1 morning – assessment and degrease: Photo documentation of every crack and damaged area. Hot pressure wash with industrial degreaser, two cycles.
- Day 1 afternoon – removal of failed coating: Shot blasting or aggressive diamond grinding, depending on what is on the slab.
- Day 2 – profile grind and crack chase: Diamond grinding to CSP 3 to 4. Cracks routed open with a saw.
- Day 3 – repairs: Crack fill, spall patching, profile blending. Allow patches to cure overnight.
- Day 4 – moisture test, prime coat: Calcium chloride moisture test. If pass, prime coat goes down. If fail, moisture vapor barrier coat is added before the prime.
- Day 5 – body coat with broadcast: Two-part epoxy coating service at full thickness. Decorative flakes broadcast into wet epoxy.
- Day 6 – topcoat with anti-slip: Polyaspartic or urethane topcoat applied with anti-slip aggregate. Drive on it the next day.
If the slab condition is good and a previous coating does not need removal, this compresses to 4 days. If structural repairs (mudjacking, underpinning) are needed, add 1 to 3 days plus the structural cost.
Did You Know?
Natural Resources Canada classifies polyaspartic and urethane coatings as eligible upgrades under several home retrofit incentives because they extend slab life and reduce concrete demand. Worth asking about whether your project qualifies for any current rebates in Ontario before signing a contract.
Common Questions About Damaged Garage Floors
Not Sure if Your Floor Can Be Saved?
Send us photos. Polished Floors will tell you honestly whether your slab is a candidate for a coating, what repairs would be needed, and what the project would cost. We work across Toronto, Mississauga, Vaughan, and the wider GTA on residential and commercial repair projects.
Reference: International Concrete Repair Institute publishes the CSP profile standards and concrete repair guidelines used in this article.